
My Home Workstation Setup/Template
I have been working remote for the last decade (!!) so configuring a productive environment in all aspect was paramount. I'm going to offer you some photos and thoughts on what makes it work for me, and I hope it inspires incremental improvement projects of your own.
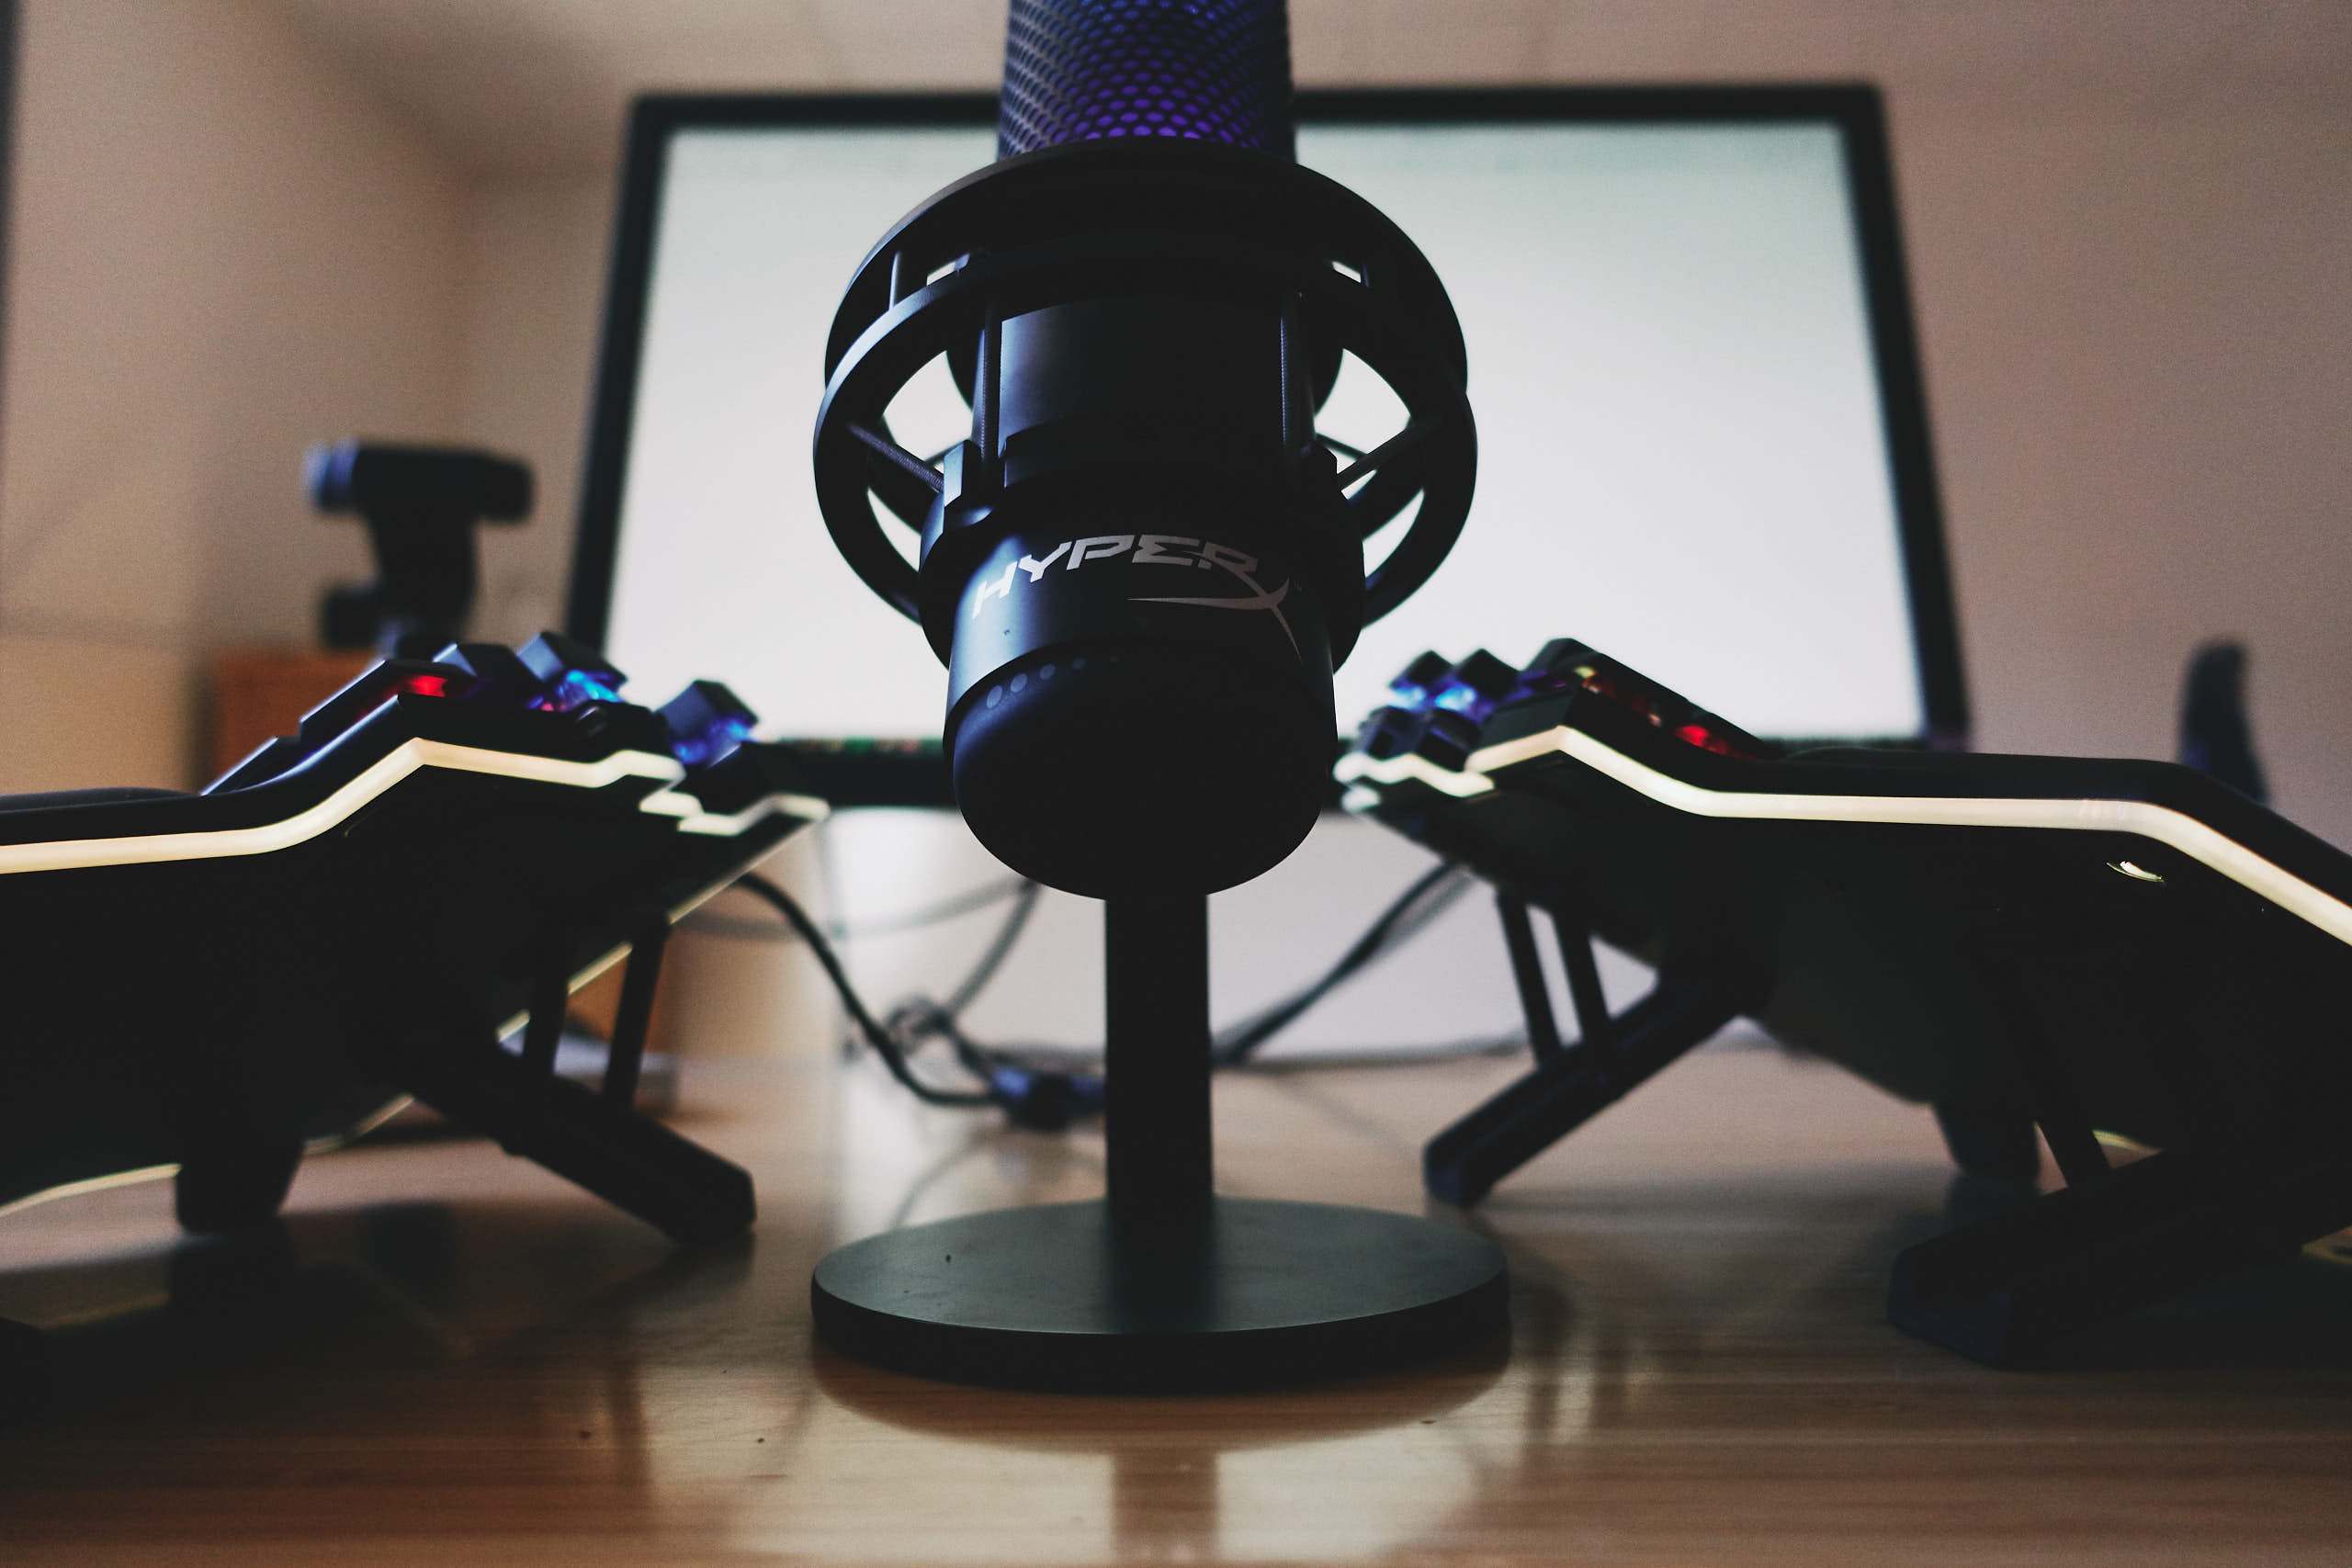
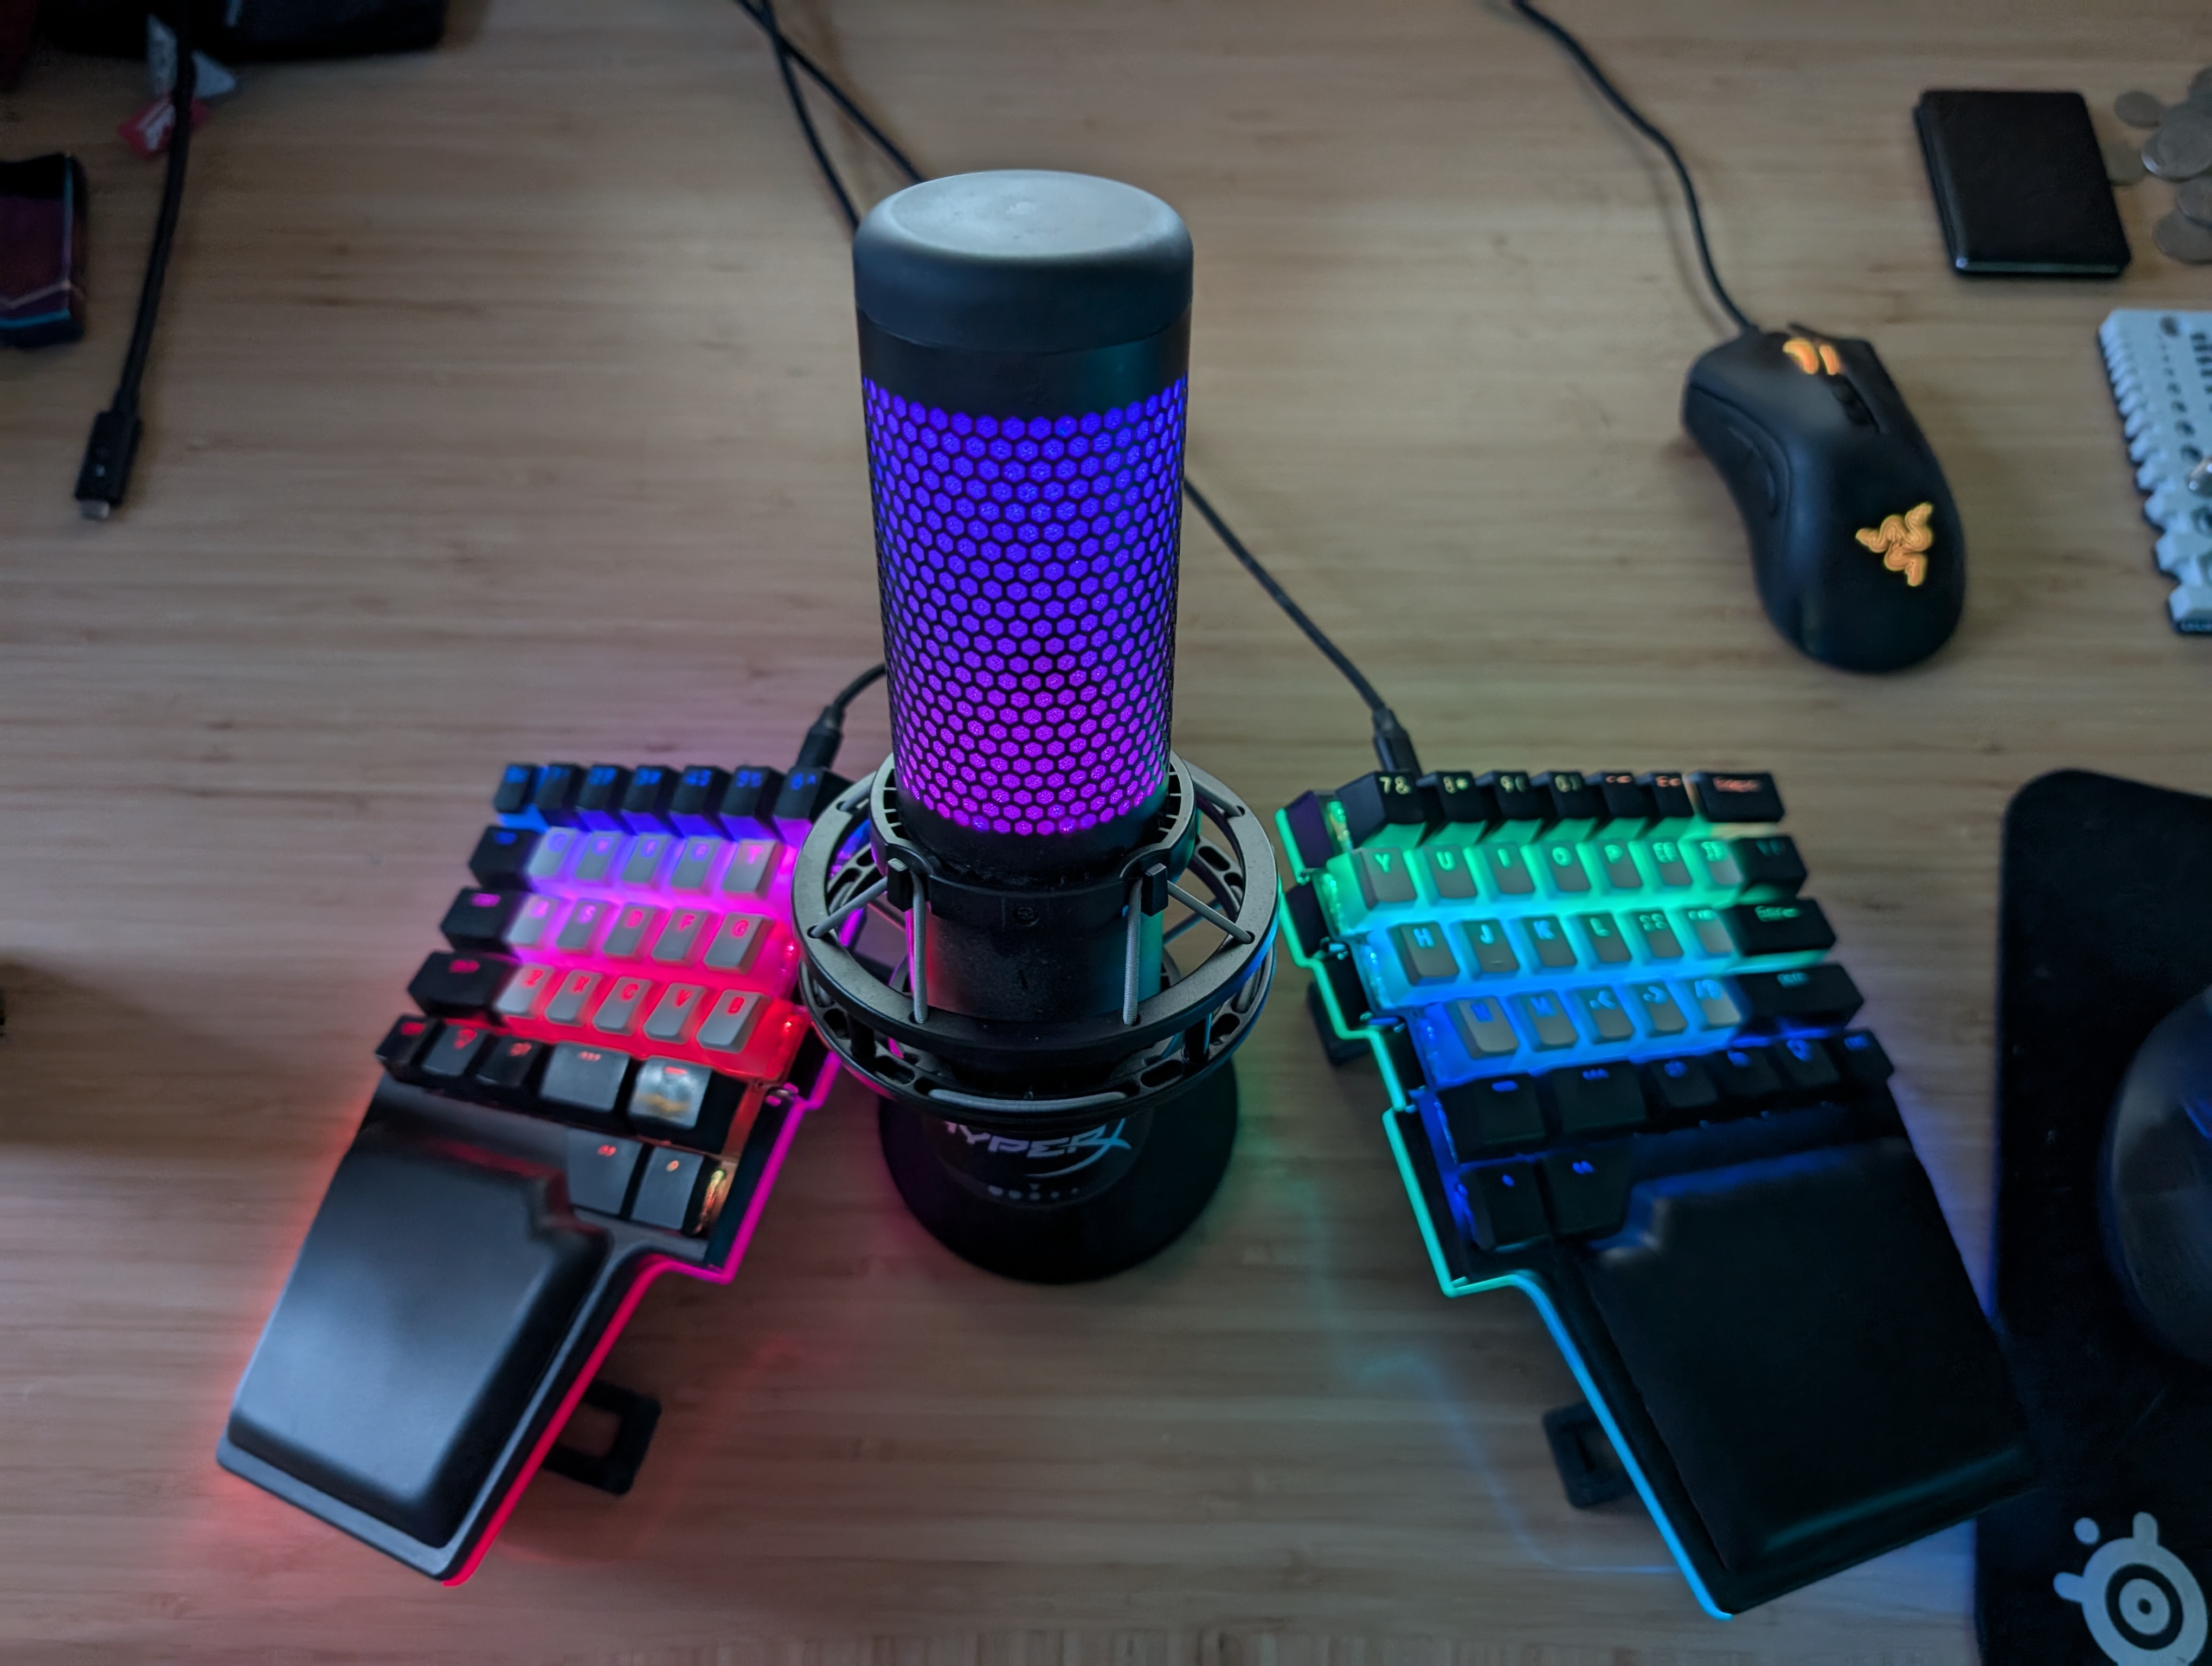
Up close and personal are the input devices: I use a HyperX QuadCast S microphone and a Dygma Raise keyboard. For most tasks, I use a Logitech Lift vertical mouse and a Razer DeathAdder V2 gaming mouse for precision tasks. Let's break that down.
Keyboard Features and Ergonomics
Perhaps the most important part of the entire setup is the keyboard. Our hands have the task of translating our thoughts into code, and the keyboard is the main interface for this (save your AI assistant jokes for now). After brielfy shopping around, the Dygma Raise emerged as my top choice. I will try to summarize the main benefits as I translate the marketing page:
- Ergonomics - there are a number of features that are meant to relieve repetetive stress injuiries (RSI), essentially this keyboard looks to re-aim the input planes in three dimensions to align closer to our natural disposition. The angle of our arms + shoulders as seen from bird's eye view (by allow to separate and re-angle the two sides), the ramp angle of our wrists as seen from the side (by providing rest surfaces), and the tilt angle of our wrists to help keep the ulna and the radius in our forearms from twisting (by tilting).
- Aesthetics - who doesn't love beautiful industrial design? The Bazecor software bundled with the keyboard allows individual key LED colors. All switches are standardized mechanical hardware and are therefore customizable (and will accept standard keycaps). I use Womier Pudding Keycaps found on Amazon.
- Functionality - Bazecor similarly will allow you to remap keys, define macros, setup virtual layers and just about anything else you could ask of a mere keyboard.
Video-conferencing/Podcasting Grade Microphone
As a remote leader, a large portion of my work was interacting with my team, with my peer leaders and vendors. It was (and remains) quite important to me that I am heard clearly and understood without effort.
You will notice that the split nature of the keyboard allows the microphone to occupy the ideal position on the desk: directly in front of me, one- to two-feet from my face. The microphone has a directionality switch that helps filter out noise coming from the speakers or other sources in the room (I have two beautiful but occasionally voical young boy cats and a 3D printer in the same room). Let's talk about the features and controls:
- Directionality and pickup patterns: you will likely want the cardiod setting like me.
- Physical isolation: the microphone is tension suspended just like professional studio counterparts.
- Hardware mute button: the top of the microphone allows you to quickly mute it. The microphone RGB backlight will turn off giving you (and those on the other side of the webcam) a cue that you are not about to speak and vice versa (!! this can be huge to promote natural conversation cadence !!)
- Hardware gain dial: located at the bottom, allows instantaneous adjustment if the person on the other end has poorly setup mixer settings.
- Tilt control: helps aesthetically and aims the pickup better.
Mice
The pointing device section is self explanatory. For the same reason as the tilting feature of the Raise, I use a vertical mouse. Helps keep those bones pointed in the right direction. This will feel odd for a few days, but you will stop noticing it after a week. Transitioning back and forth between that and the Razer is natural and works well. Both device remain connected and generally cause no issues.
Monitor Mounting and Webcam
Moving onto the opposite side of the desk, I have devised a simple but effective way to maximize space and combine the monitor + webcam angles reasonably aligned.
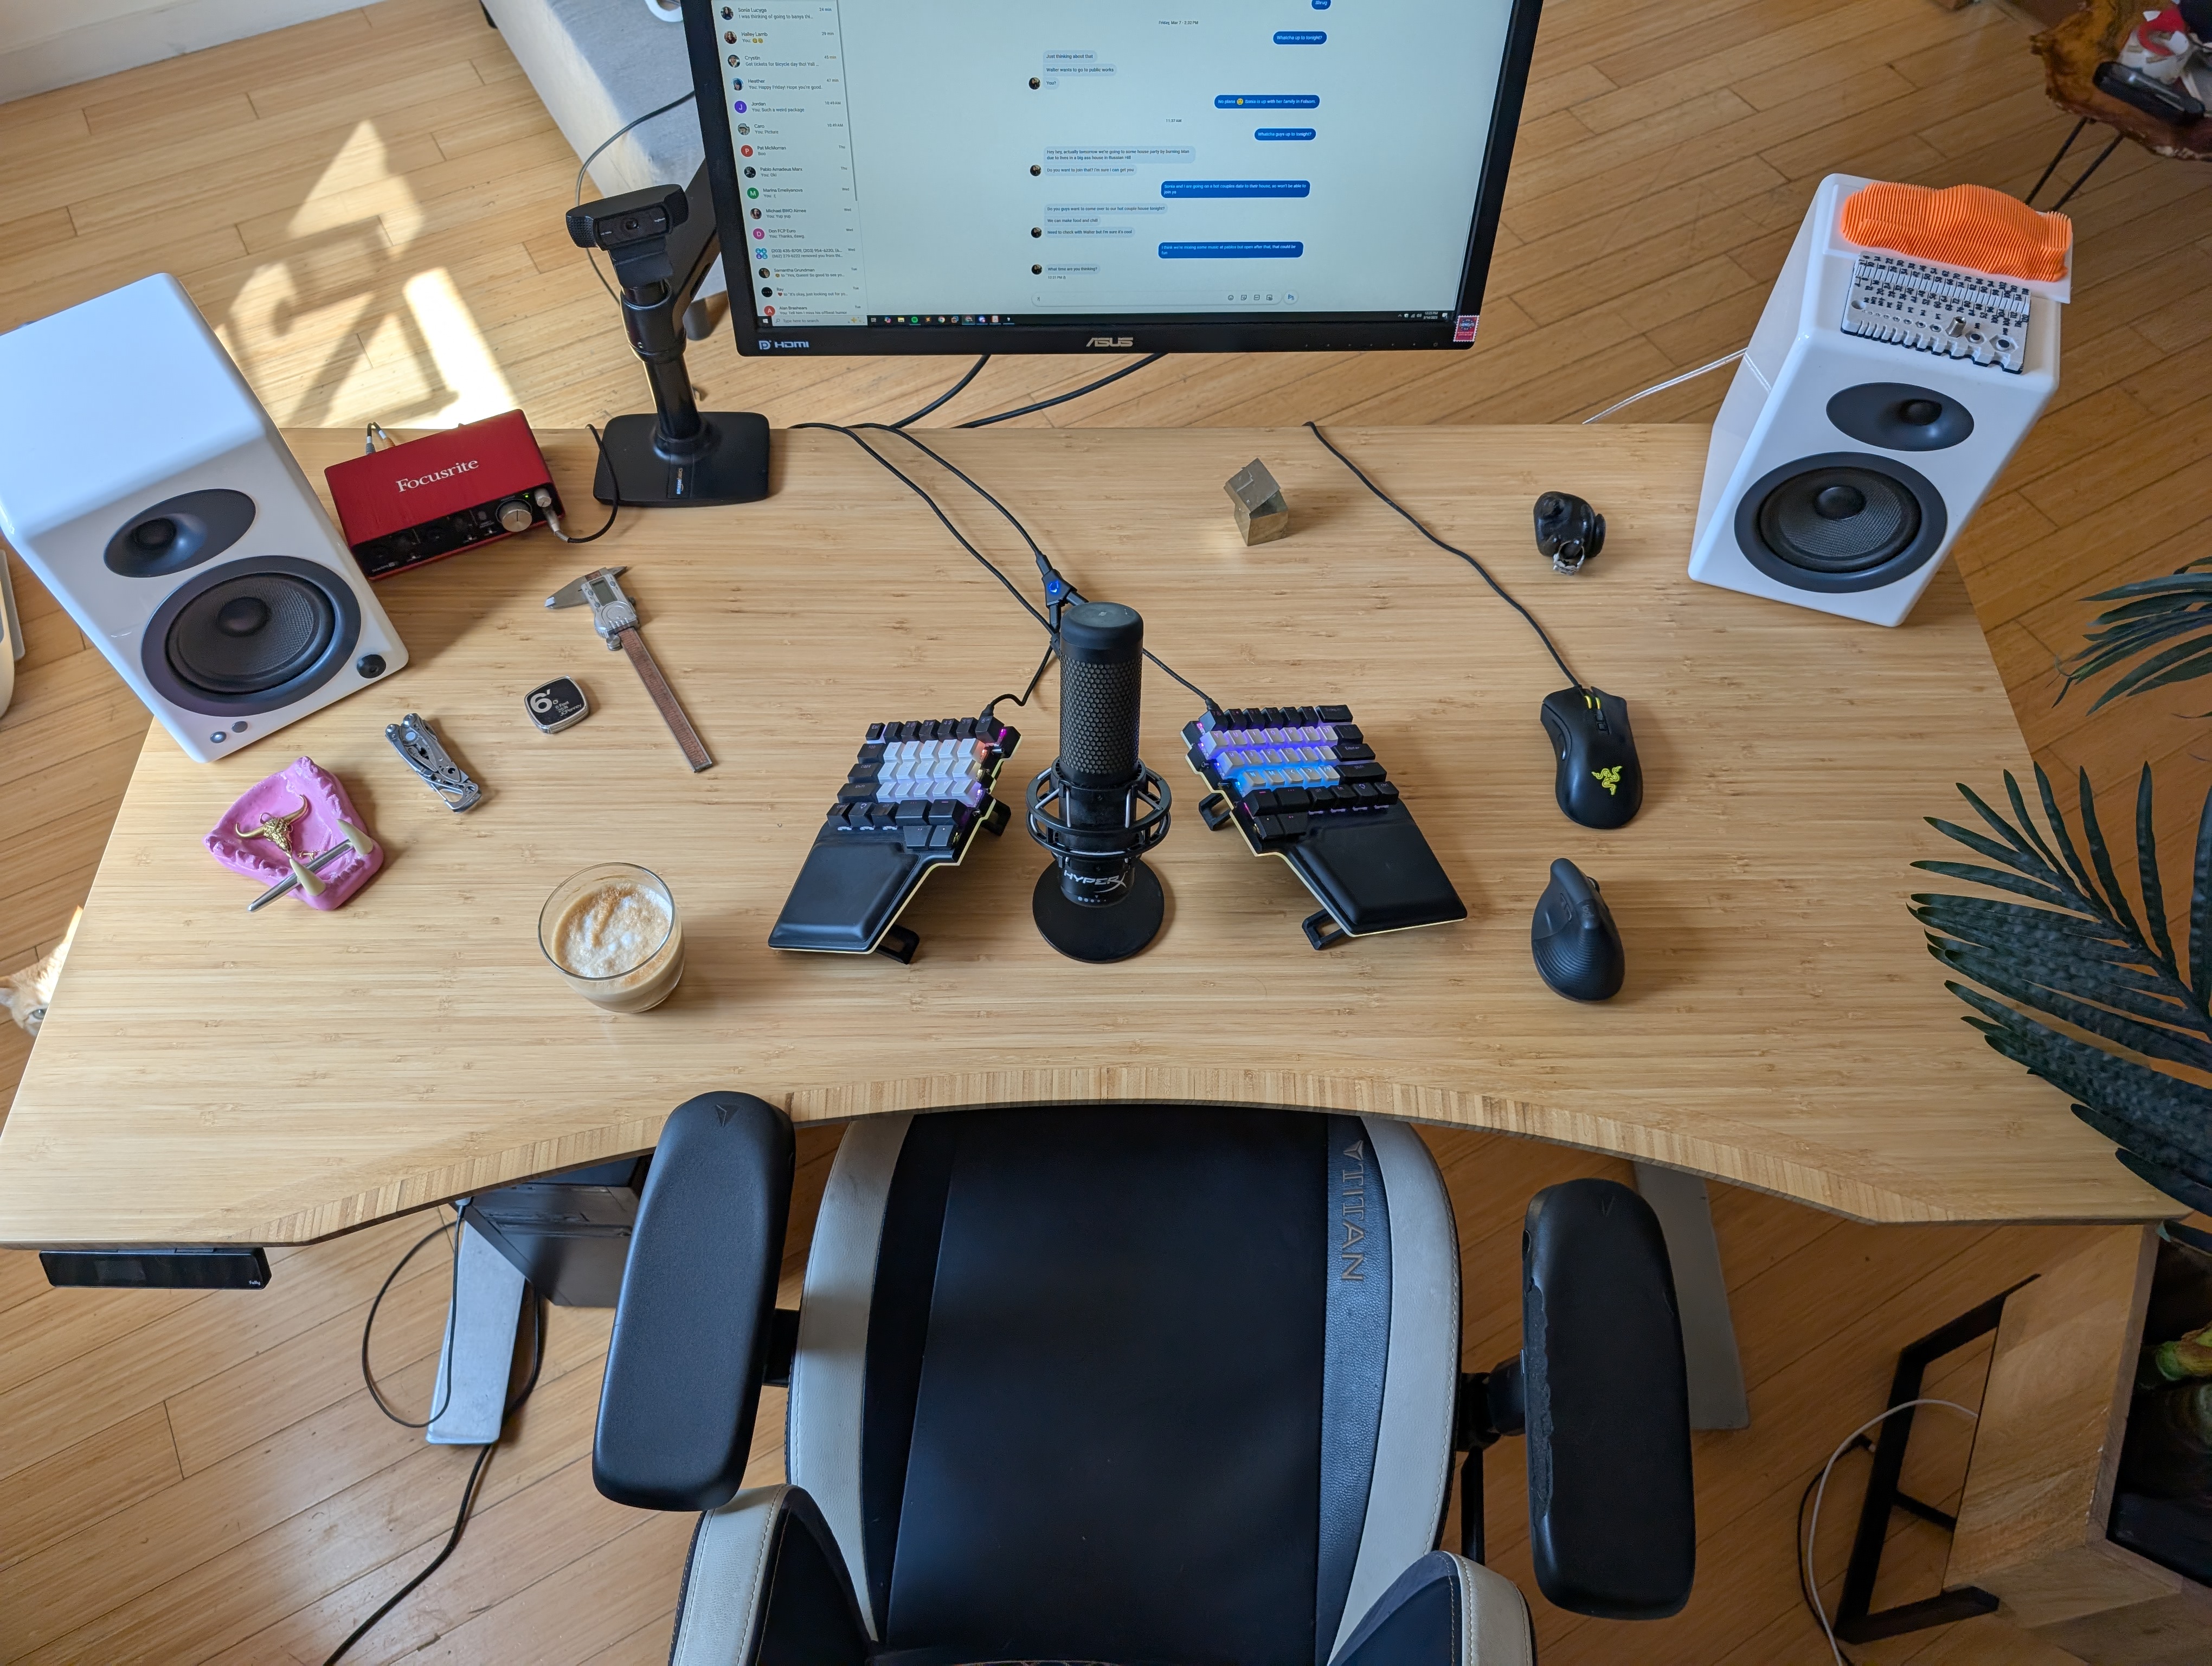
I use an affordable Amazon Basics tension loaded monitor arm which means almost no desk space is taken up for the monitor. Similar products will suspend any size and model monitor of your choice. For us creatives (I am a photographer) I can recommend buying an sRGB calibrated monitor. If you game, consider a higher refresh rate (hz) unit. The rest is largely a matter of taste and budget.
Notice how my Logitech HD Pro Webcam C920 is mounted at the same height as the monitor and as close to the edge as possible. This is intentional. While ideally you would be looking straight at the camera so as to emotionally engage the other party better, it is not currently possible. Aligning the camera with the central X or the Y axis of the monitor will do the until we get centrally embedded sensors within monitors.
In order to mimic my webcam mounting, you will want to use something like the 1/4"-20 male-to-male adapter after drilling a hole through the top of the column plastic cap.
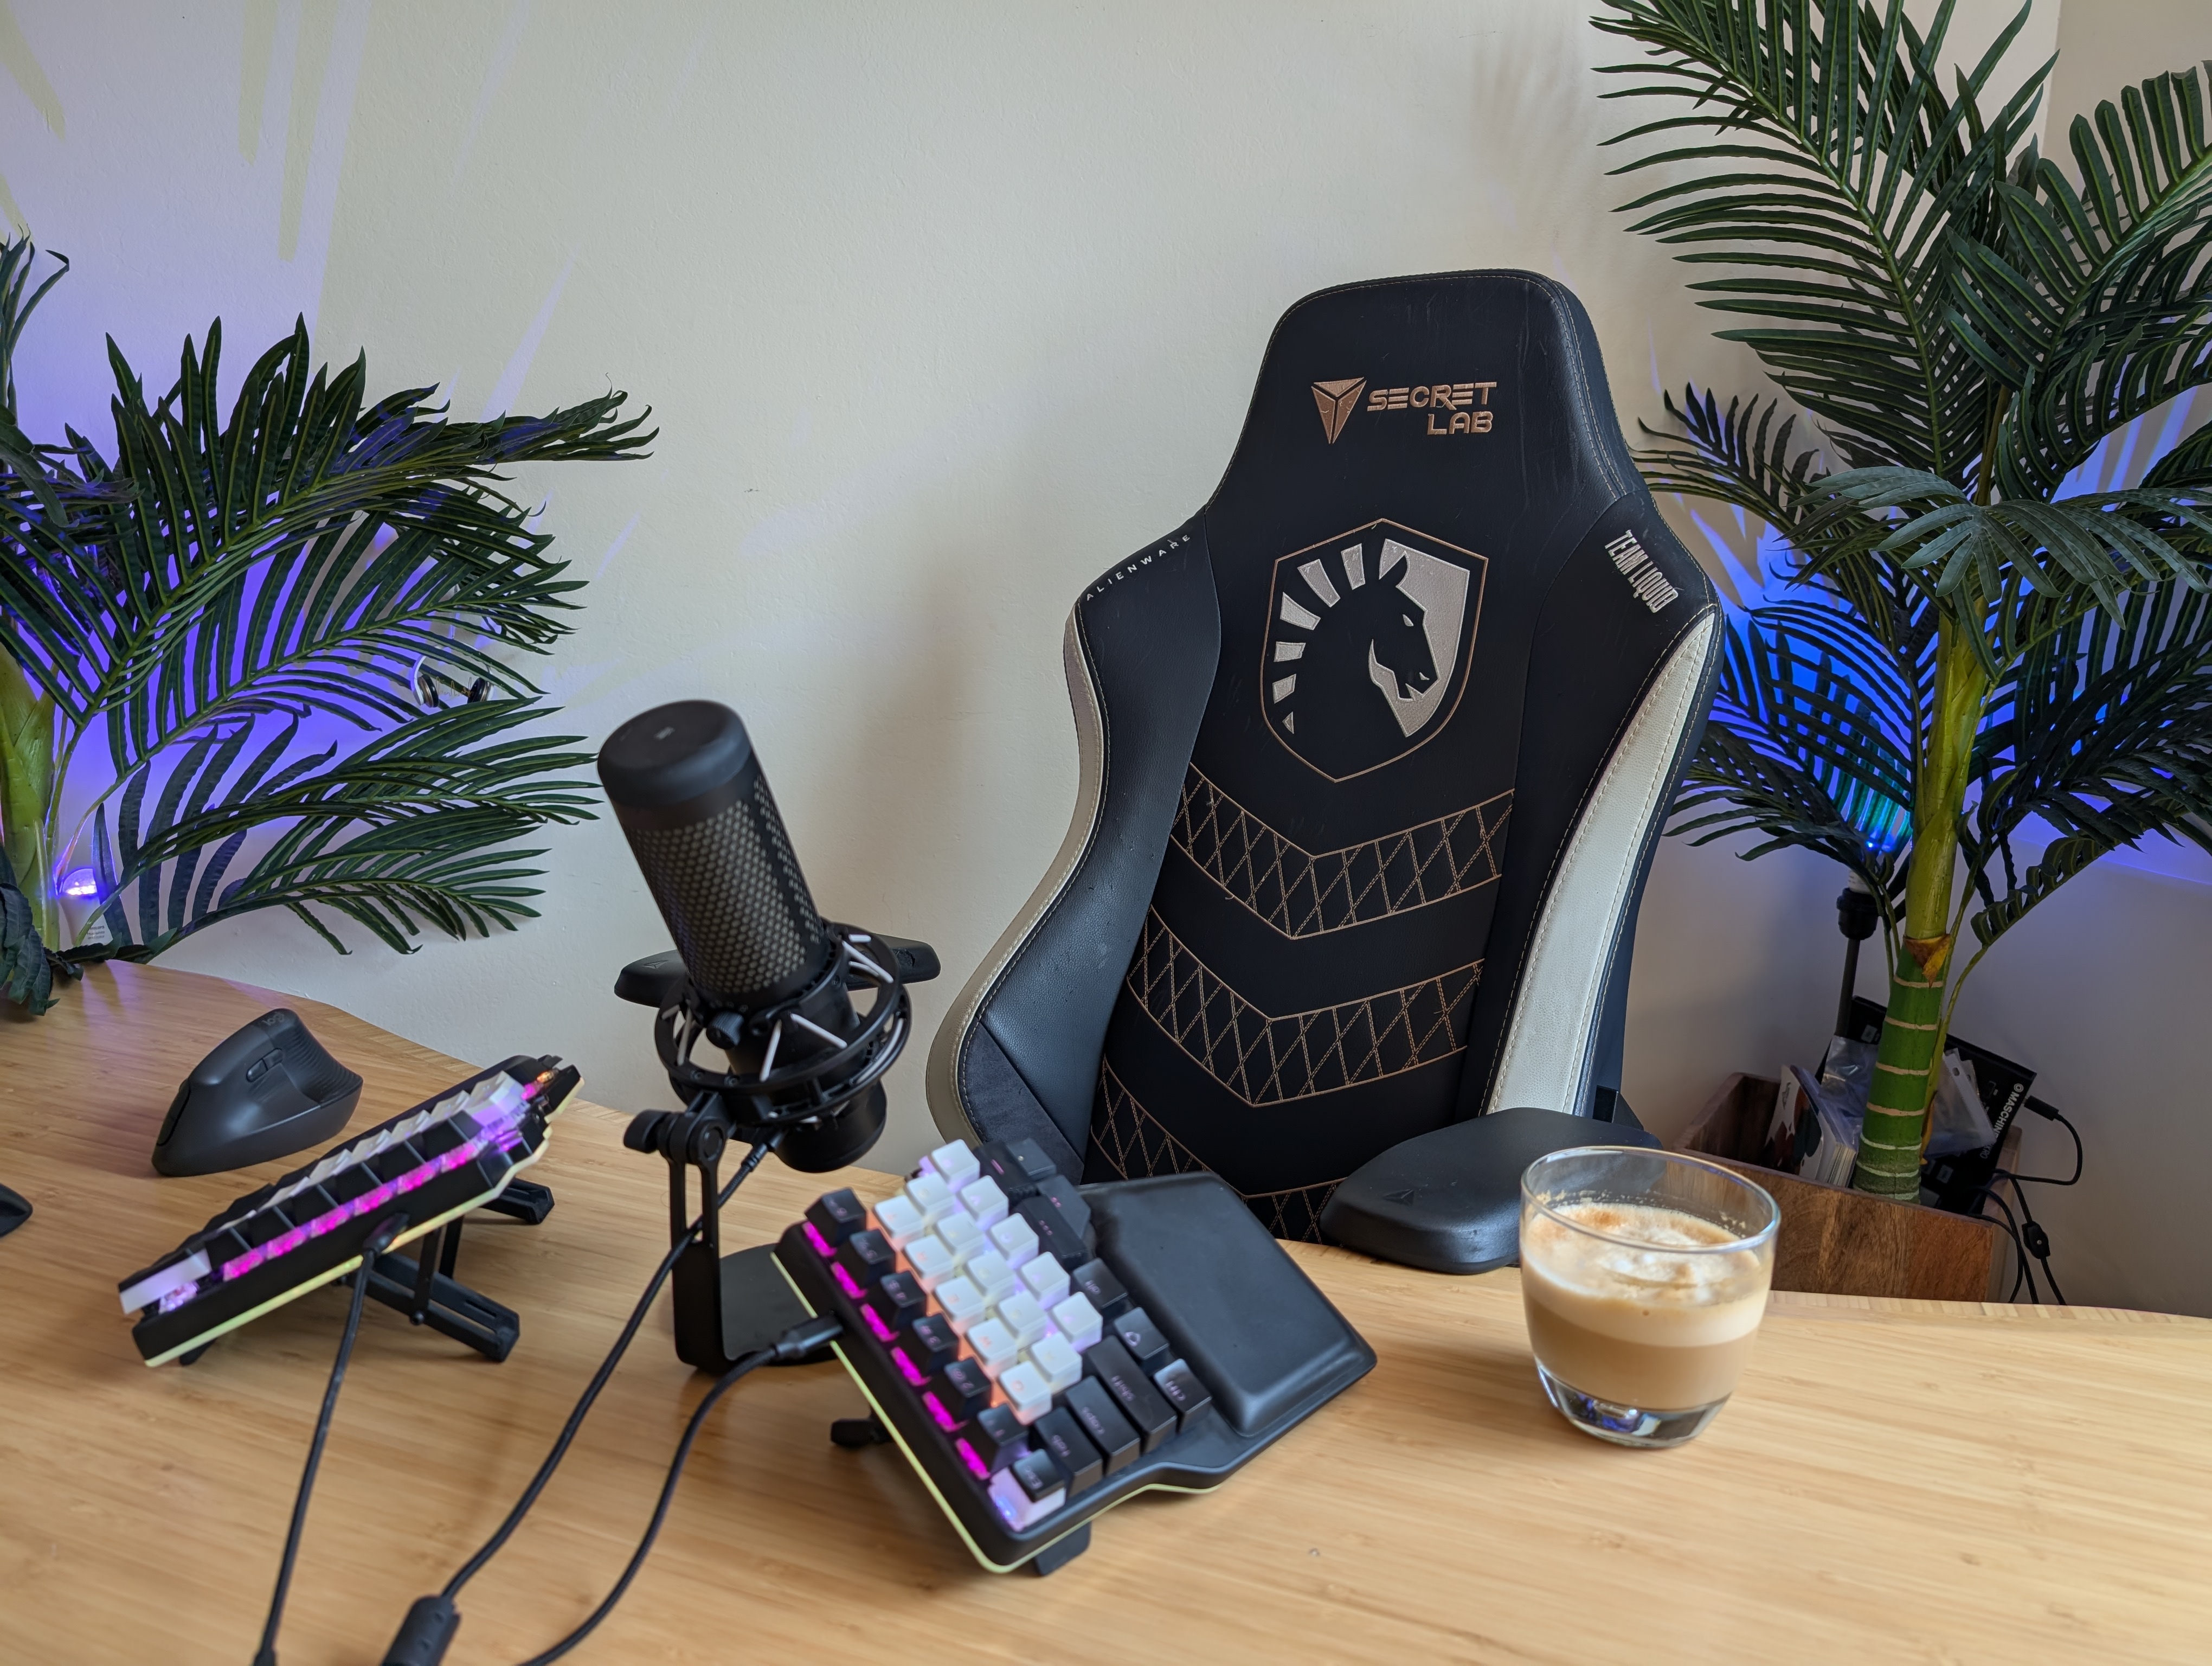
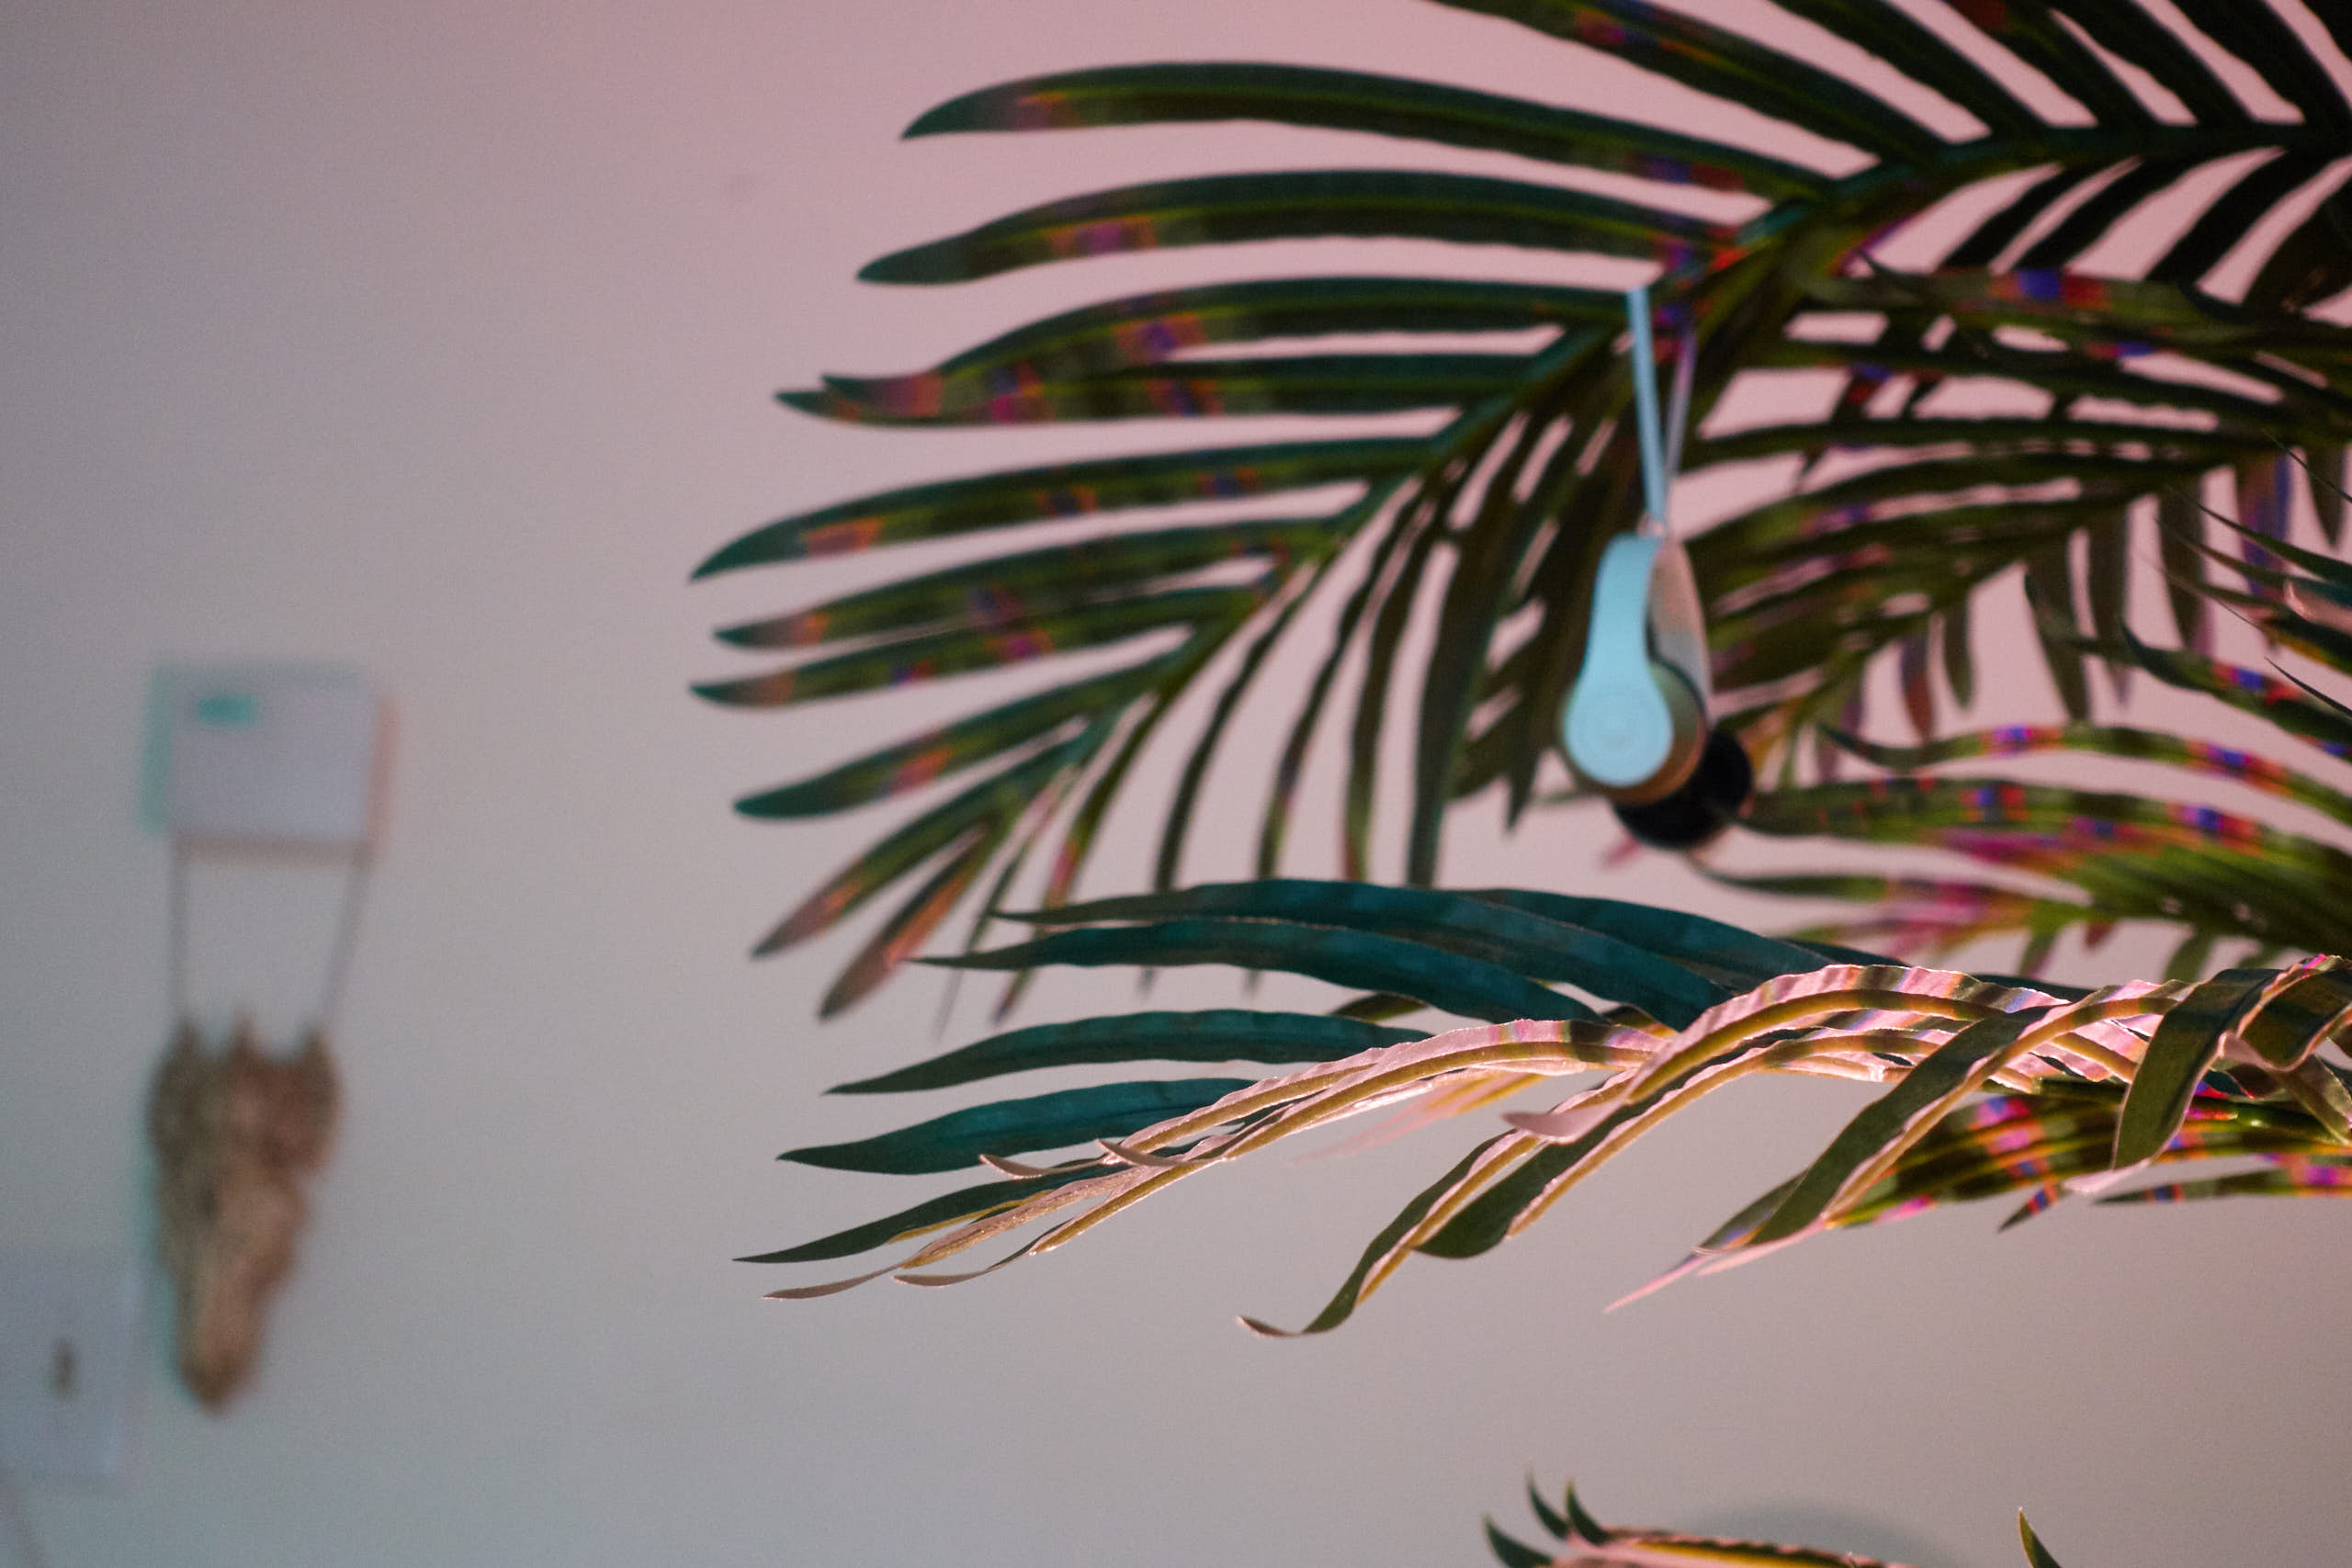
Speaking of webcam angle and placement, I tend to not like the use of artificial backgrounds so I took the time to setup what my coworkers see when working with me in realtime. I use fake palm trees with shattered-difuser Philips Hue bulbs to create really cool additive RGB lighting effects as they filter through the leaves and cast shadows on the wall behind me.
If you want to achieve this effect, you will have to physically break and remove the hazed glass diffuser meant to mix colors from the individual LEDs within the smart bulb. TODO: Upload a photo showing this.
Audio Interface, Speakers and Headphones
I'm a bit of a music nerd, so I use a dedicated audio interface to connect my headphones to the computer. I use the Focusrite Scarlett 2i2. This isolates the audio signal from the motherboard (by way of USB), allows dedicated hardware level knobs and provides very low intput and output latency when I feel like experimenting with synthesizers. Much like with mice, both speakers and headphones are connected simultaneously, a quick twist of the knob redirects the signal where I need it.
At my desk I prefer to use open air AKG Q701 whereas for live DJing, you would want something closed ear like the Audio Technica ATH-M50. For speakers, and once again due to my sound design appreciation/background, I use studio monitor grade Audioengine 5+. You want to separate them, point them directly as your ears as much as possible for clear stereo separation.
The Desk and the Chair
I use an electrically height adjustable standing/sitting desk by Fully. I can recommend it to anyone, the Bamboo top is durable and nice to look at, I prefer the curved edge version.
Coupled with this, I like the Secret Labs chair with generous lumbar support. Remember to do some reading on proper posture when setting it all up (I'm as guilty as anyone).
Good Luck!
Next time someone mentions my setup on a call, I finally have a place to point them to. Whew.
I hope this implores you to do some creative thinking about how you interact with your tangible tools! I had a lot of fun figuring this out over the years. Send me a message on LinkedIn and show me what you came up with.